One of the things that came out of WOzFest /// for me was that most, if not all, of my Disk ][s were no longer operational.
Given my desire to recreate the original Apple ][ setup we had when I was a teenager, operational Disk ][s are a must. Despite my infatuation with modern solid state storage solutions for retrocomputers, there’s just nothing quite like closing that door and hearing the mechanical symphony of a Disk ][.
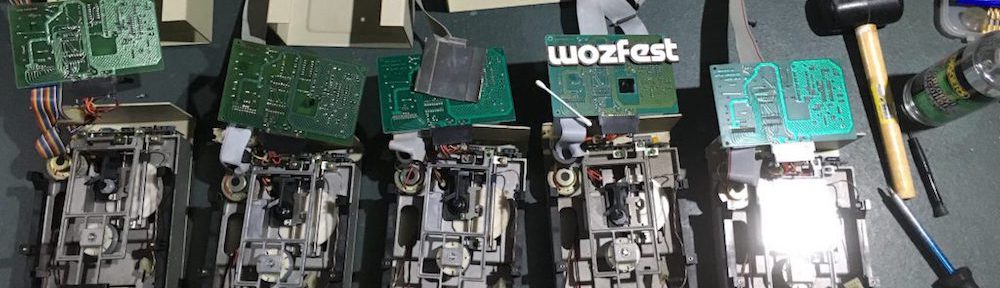
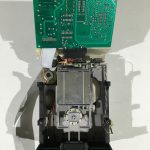
So, in preparation for WOzFest $04, I decided to give my five Disk ][s a bit of TLC and try and get them all working (Figure 1).
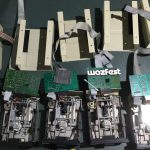
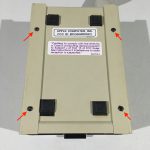
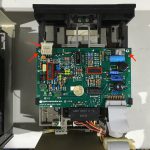
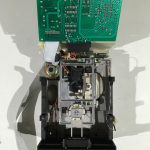
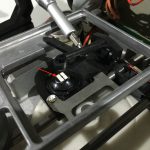
Step one is to crack them open with a view to cleaning the read/write heads and possibly lubricating the rails. Luckily, they’re pretty simple devices to get into – four screws on the underside (Figure 2) and the upper case slides off the drive mechanism, showing the bare drive mechanism and the analog card that drives it (Figure 3).
To get to the read/write head, another two screws holding the analog card need to be removed and the card can be slid out of two slotted guides towards the rear of the drive (near the “D”s at the rear corners of the analog card). The analog card has two cable connections – for quick and simple work, only the one closest to the front of the drive (with a molex connector) needs to be disconnected to allow the analog card to be flipped upside down over the rear of the drive (Figure 4). This cable’s connector is “keyed” with a missing hole for the missing pin on the header to aid alignment and orientation.
Some Disk ][s have a plate covering the read-write head – this is simply clipped into place and easy to remove (Figure 5). You can then (gently) raise the sprung component (not too high!) of the drive head (which holds the disk against the read/write head) to clean the actual read/write head itself (Figure 6).
I’m leaving the outer covers off and the analog card unsecured in the drives I’m going to be using for disk imaging – this allows easy access to the drive head for cleaning. It’s amazing how quickly gunk builds up on the read/write head. I’m using isopropyl alcohol and cotton tips to clean the heads.
I had to lubricate the rails the head mechanism travels along in one drive – I used white lithium lubricant applied liberally with a cotton tip, then wiped off the visible excess with a paper towel after moving the head mechanism up and down the rails a few times.
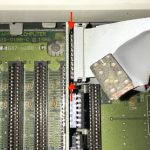
Unfortunately, while working on my drives, I connected one to the interface card in the Apple ][ incorrectly – while I had it properly aligned along the length of the connector, I only plugged it into the outer row of pins, rather than to both rows (Figure 7). Snap, crackle, pop! I’d burnt out something on the drive’s analog card.
I was pretty sure the next drive I connected to the Disk ][ interface card I was using was connected correctly, but it also popped and was no longer working. I wondered if maybe something on the interface card had blown as well?
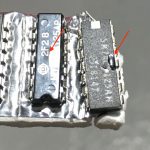
Visually, I could tell that the 74LS125 logic chips on the Disk ][ analog cards had blown (Figure 3 and Figure 8). By this point I had some confirmed working drives, so I swapped in a 74LS125 from a working drive’s analog card – the drives still didn’t work (I was using a different interface card in case the one I’d been using was also now a dud).
At this point I swapped a known good analog card into both drives in turn just to make sure that’s where the problem was and both drives worked, so I went back to swapping other chips from a known good analog card. Luckily, there aren’t many chips and I quickly determined both analog cards’ MC3470 chips were also faulty, even though there was no visible damage.
I was able to buy 74LS125s from my local Jaycar electronics store (for AU$1.75 each), and I bought replacement MC3470s from eBay (for about AU$2.50 each including delivery) – I bought enough of both chips to test a repaired drive with the suspect interface card. If the drive blew again I would be able to replace those two chips again.
As it turns out, that interface card didn’t blow up a repaired analog card, so I think it’s OK and I must have connected the second drive incorrectly as well. I vow: never again!
So, after all that, I now have five operational Disk ][s, and a bit more experience and confidence in doing my own retro repairs (which bodes well for my Retrochallenge entry).
Feel free to share your own Disk ][ damage and repair stories in the Comments section.
Thanks! I have some 5.25″ drives that have been sitting idle in my basement for many years now and I knew I’d need to do some maintenance on them before putting them back into operation. This will be very helpful.
I noticed you didn’t mention anything about any rubber drive belts or similar; is that something else I should investigate for wear or perishing?
Hi Martin – this is just a real basic, “clean the heads” style refurb – of course, the removal of the case is required for checking/adjusting the belt and timing. I couldn’t find any videos of the speed adjustment online, but I found this page with instructions on adjusting the speed.
The flywheel should have calibration patterns for both 50Hz and 60Hz electricity supplies. There are programs which can check the speed is right if there’s no calibration pattern.
Hope that’s of use – if I get to doing those adjustments, or the ones Stephen Buggie did at KFest, I’ll post an update.
europlus